A few days ago I decided to change my hard drive for an SSD. It always happens that if you have a computer that is more than a few years old(Six and a half in my case), it isn’t a good idea to spend more money on it. It’s true but not in all cases. Taking advantage of #BlackFriday deals on SSD, I decided to buy one and it was a great idea. With this post, I just want to tell my experience in case someone is in my situation. I hope this can help you.
Upgrade Process:
- You need to create a bootable USB with the operating system that you need. First, you have to download the operating system, in this case OS X ‘El Capitan’. Then I used the free software Diskmakerx, with a few simple steps, you can create the USB that will serve to install the OS on the new SSD. The USB that is used has 8GB of capacity.
- The next step is to save all the information you want to keep on an external HD.
- Next, we need to buy the SSD. In my case I decided on this model because it doesn’t give problems with the Macbooks and it has good reviews on the internet.
- Change the disk physically. You only need remove the battery, remove a little platen and change the old disk with SSD. The complete change takes less than 10 minutes. It’s great.
- Install the new OS in the system. With the USB created in step 1 and plugged into the laptop, you turn on your laptop holding down the ‘alt’ key and select the only option that you have. You must follow the installation steps with patience.
- The upgrade is done!
Don’t forget these things once the process is done:
- It’s important to check if the SSD is working at the correct speed. In general, the SSD disks work with SATA 3 technology, but sometimes they don’t fit properly. In my case, my laptop’s motherboard works with SATA 2 and as you can see the drive fits properly at that speed. This means that I’m not squeezing the maximum speed of read / write drive, but the drive operates at maximum speed that my motherboard accepts.

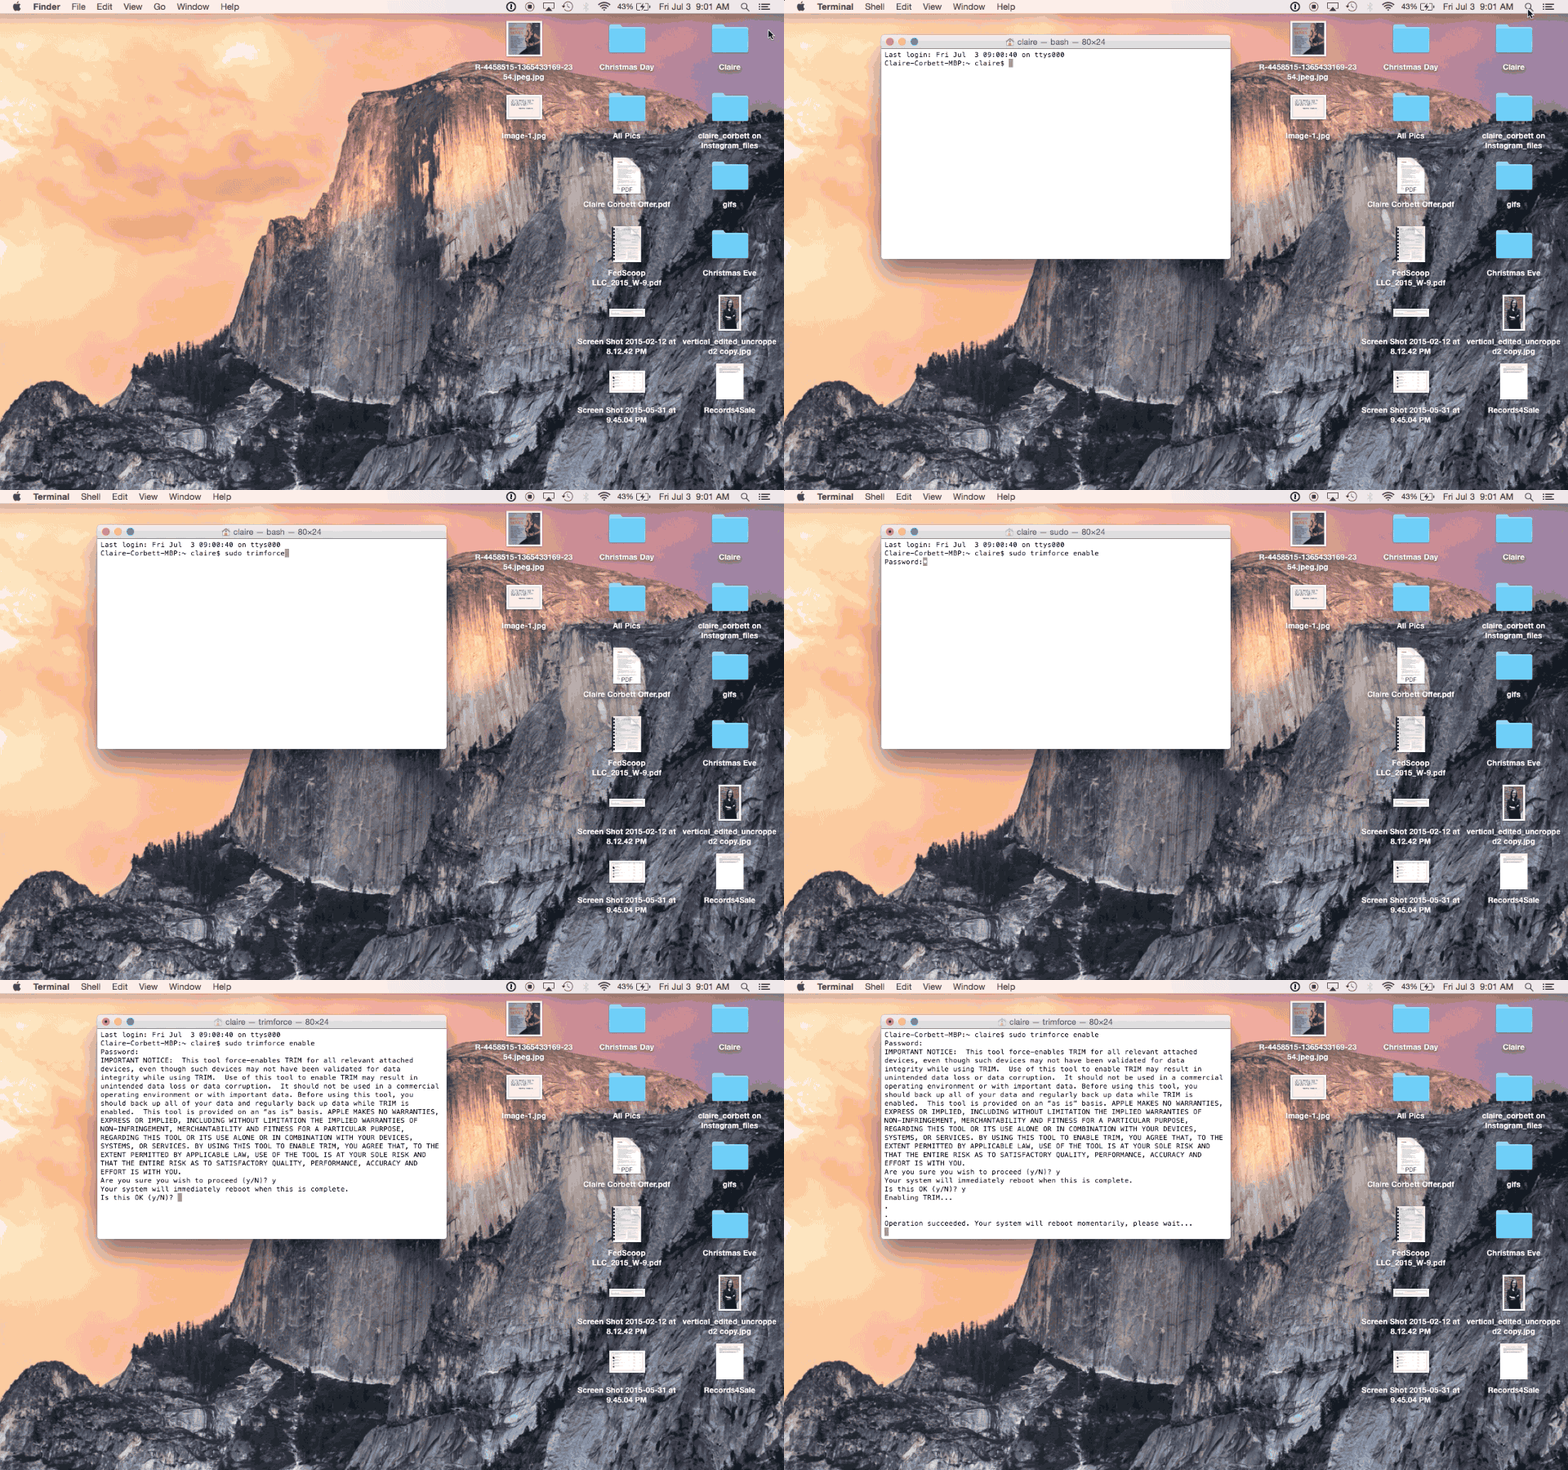
- TRIM. It is better for the life of the SSD that we have an active TRIM feature. This ensures that the drive works better managing the deletion of data. By default on disks that aren’t Apple, they come with this option off. To activate it, it’s only necessary to launch a command by terminal and let it do the process alone. When the laptop restarts it’ll already be activated.

After everything, we can say: “the upgrade is complete!”. My opinion on the change is more than satisfactory. The read / write speed is faster and the computer startup programs and opening is much faster than before. Here you have a video to give you an idea.
That’s all folks! Thanks for everything!